Showing posts with label recipes. Show all posts

Thursday, February 15, 2018

Recipe: Chicken and Veggie Brown Rice Casserole for Instant Pot

This year, I got myself a Christmas Present. An Instant Pot. I've been hearing about them for a while now and the people who have them absolutely love them. To be honest, I was skeptical. Could an Instant Pot really be THAT great?


Turns out, it is. I've actually started calling it my Magic Pot. So far, I really have not had any major fails, and it is saving me a lot of time on both the cooking and the clean-up. It's actually helped us to cut down on ordering out because I can go work out and still get dinner ready in a reasonable amount of time. Mostly I have tried other people's recipes, but once I got comfortable I started trying to create some of my own, like this one.


This recipe came about because I was trying to find a good chicken, veggie, and brown rice casserole, and everything I found had white rice. The first time I made this, I loved how it came out! I couldn't believe it worked! I thought maybe it was a fluke, so I have now made it 3 more times and also had a friend make it with a different brand of pressure cooker. It turned out great for her, too!

The true test... will the rest of the family eat it? My kiddo loves it!


I love that she is getting a protein, a healthier carb, and three veggies (onion, carrots, and broccoli)! The rice in this casserole really has a great texture-- it's very creamy, almost like a risotto.


I've posted the recipe below, but I wanted to give a few notes.

First, I'm sure you could adapt this to use white rice. You'd probably need to really adjust the cook time since white rice cooks a lot faster. However, I use mostly brown, so I haven't tried white rice.
Second, I'm sure you could add the broccoli to the Instant Pot before starting the cooking. However, I think after 25 minutes, it would become mush. So I use this handy pot from Pampered Chef to steam mine in about 4 minutes in the microwave. I use frozen baby broccoli florets. I steam them the last 3 minutes of the cooking and after I release the steam, I add the broccoli. (Side note... that little steamer pot is a STAPLE in this house. I bought it on a whim and it is something I use at least 3-4 times a week.)

Hope you guys enjoy the recipe! Man, it's been a long since I posted a recipe, and I'm trying a new plug-in to add the recipe card here. Let me know what you think!

Yield: 6 Servings

Chicken and Veggie Brown Rice Casserole for Instant Pot

prep time: 10 MINScook time: 25 MINStotal time: 35 mins
This super-easy casserole combines brown rice, veggies, chicken breasts, and cheddar cheese to create a meal that is both filling and healthy!

ingredients:


  • 1 TBSP Olive Oil
  • 1 TBSP butter
  • 1 medium yellow onion, diced
  • 2 cloves of garlic, minced
  • 1 cup of chopped carrots
  • 2 2/3 cups chicken broth
  • 2 cups brown rice
  • 2 large chicken breasts (fresh or frozen)
  • a few splashes of Worcestershire Sauce
  • salt and pepper, to taste
  • 2 cups broccoli florets, steamed
  • handful (about 2/3 cup) of shredded cheddar cheese 

instructions:


  1. Select the saute button on your Instant Pot.  When the pot is hot, add the oil and butter. Wait about 30 seconds for oil/butter to heat up.
  2. Add diced onion to pot and cook for about 2 minutes.  
  3. Add garlic and carrots and cook until garlic is fragrant.
  4. Add chicken broth and stir to release any brown bits on the bottom of the pot. 
  5. Add the rice and stir.  
  6. Add the chicken breasts.
  7. Add salt, pepper, and Worcestershire Sauce.
  8. Press "Cancel" to end the saute feature.  Manually select the High Pressure button and set the timer for 25 minutes. Make sure to set the vent to "Sealing."
  9. While the casserole is cooking, steam the rice in the microwave.
  10. Once the time is up, Quick-Release the steam and then open the pot.  Stir to combine all the ingredients.  The chicken should fall apart easily, but you can use forks to shred.  
  11. Add steamed broccoli and shredded cheese.  Stir once more to combine.
  12. Enjoy!
Created using The Recipes Generator


-Liz

Monday, February 3, 2014

Paleo Buffalo Chicken Bites

Note: this was supposed to be published on Friday! So, can we all please mentally rewind and pretend it is Friday as you read this?

Happy Friday! TGIF! It actually doesn't feel like a Friday at all. We have been off of work since 1:00 on Tuesday due to snow and ice! I won't lie, a 2 1/2 day work week was pretty nice! We had some time to sled, cook, watch movies, clean the house, and relax!

It doesn't look like much, but our street was a big sheet of ice and beieve it or not, Ryan, Sadie, and I did a lot of sledding on that hill!

I think the thing that is greatest about a snow day is the fact that you don't know it is coming. So when you get it, it is like being given a gift of extra time. Since I expected to be various places (work, teaching Zumba, church) and they were all suddenly canceled, I found myself with 48 hours of free time with my family.

We also got to do some cooking.

We made snow cream! I got the idea to put out a big bowl BEFORE it started snowing so that we could collect snow for snow cream. This way, we would not have to scrape the snow off of the ground or other dirty things.

Recipe:

  • 2 cups of snow
  • 1/2 cup of milk
  • 2 Tbsp sugar
  • 1/2 tsp. vanilla

Mix well and enjoy! Makes 2-3 small servings.


I also had time to create these Paleo Buffalo Chicken Bites. I know with the Super Bowl coming up, lots of people are looking for snack ideas. I think these would be a hit, especially if you like spicy chicken wings!

Paleo Buffalo Chicken Bites

Ingredients:

  • 3-4 raw boneless, skinless chicken breasts, cut into bite-sized pieces
  • 1 egg, beaten
  • 3/4 cup of coconut flour
  • 2 tsp. garlic powder
  • 2 tsp. onion powder
  • 1 tsp. salt
  • 1/2 stick butter or ghee
  • 1/4 cup Frank's Red Hot Cayenne Pepper Sauce


Preparation:

  • You will need two shallow bowls. Place the beaten egg in one bowl. In the other, mix the coconut flour, garlic powder, onion powder, and salt.
  • Using tongs, dip each chicken "bite" in the beaten egg, and then dredge in the flour mixture. Place on a baking sheet lined with parchment. Repeat until all the bites are coated and ready to bake.
  • Bake the bites at 400 degrees for about 5 minutes. While the bites are baking, mix the 1/2 stick of melted butter with the Frank's.
  • Remove the bites and brush one side with the Frank's mixture. Bake 5-6 more minutes. Then turn each bite over and brush the other side with the Frank's mixture. Bake 5 more minutes, or until cooked through.
  • Add a cup of homemade ranch dressing and start dipping! Add some celery sticks if you like!

Now, settle in and watch some football. Or a new episode of Downton Abbey. ;)


Note: the fancy camera was charging, so the iPhone had to step in for photos.


Tuesday, January 21, 2014

LizzieBars: the Homemade Alternative to LaraBars :)

Happy Tuesday! Today is totally confusing me. We had yesterday off of work, so all day long I kept thinking it was Monday. Short weeks always feel weird. Our weekend was busy! We celebrated my dad's retirement this weekend in Greenville, SC. It was lots of fun to be with family. We even did a little bowling on Saturday!


On Sunday, we headed home to do some painting at the house!

(Family shot on the front porch)
 
We were very lucky that our house was move-in-ready. There wasn't anything we HAD to do before living there. However, there were a few projects we needed to do ASAP. One of the bedrooms was decorated for a little boy- or a paleontologist. :)

As attractive as these dinosaurs are...they are kind of scary for a guest room, right?

If you are wondering how many coats of paint it takes to cover dinosaurs... The answer would be 5: 3 coats of primer and 2 coats of paint. Here's a (sort-of) after shot. We still need to apply a second coat- hence the taped outlets.


We were also painting this bedroom over the weekend:

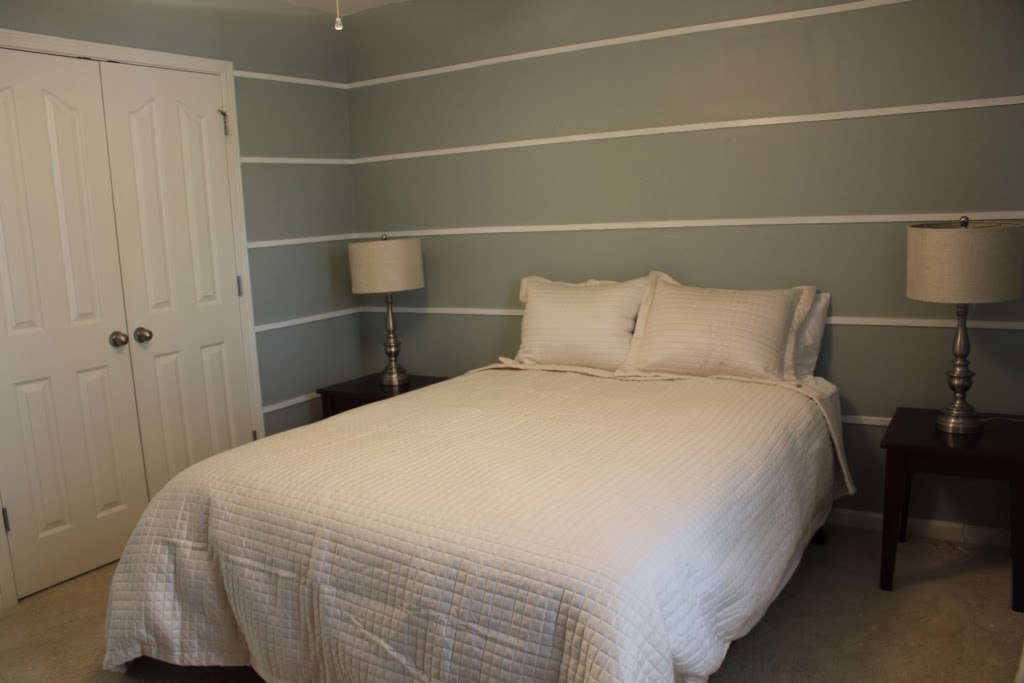
This bedroom has an interesting wall-decor-technique. Those are wooden slats nailed to the wall. That made this paint job pretty tedious. We had to paint the wall color first and then go back and paint all the slats. The husband was ready to call a professional within the first hour, but we finally finished it last night!

After:

I still want to add a little color to this room. But I like the way the blue and white is kind of calm and peaceful.


So... on to the food. (I know that's why you stopped by!) Do you have a favorite energy or snack bar? I feel like I have tried them all. I've become really picky about energy/protein/health/snack bars. I've started looking at ingredients and most of them are full of...well...crap. Lots of sugar, lots of preservatives, lots of not-so-good-for-you ingredients. But then I came across LaraBars. Larabars are great.

Their ingredient list is short, they are made from real food, and most of them don't even have added sugar. My favorite flavors are Banana Bread, Cherry Pie, and Apple Pie.

My only complaint about Larabars is the fact that they tend to be a little on the expensive side. I decided to try making my own, just to see if I could.

Introducing... LizzieBars!


I decided to try a different flavor so that I wouldn't be comparing it directly to Larabars: Honey Cranberry Almond. I started by throwing some dried cranberries, dates, and into the food processor. I pulsed the mixture until the items were slightly chopped. Then I added about 1/2 teaspoon of honey and a few drops of vanilla, just to boost the flavor. (I know adding honey means adding sweetener, but if think the health benefits of honey outweigh this tiny bit I used.) I continued to blend the items until they were more finely chopped and the mixture started to stick together.


Next, I pressed the mixture into a glass baking dish lined with waxed paper. I put the dish into the fridge for a while to help the bars to "set" and then cut them into bar shapes and bagged them into snack-sized baggies.

I really liked the Honey Cranberry Almond Mixture. I do want to try and attempt a banana bread flavor and maybe a cinnamon apple flavor.

Larabars OR LizzieBars are great for a pre-workout snack or a post-workout snack. They also are great for afternoons when you eat lunch really early and work late and need something to get you through the day. Because these are made with dried ingredients, I would think they would keep at least a week or two in the fridge- but I can't say for sure.

Let me know if you try making your own!


Friday, August 9, 2013

Bacon Brussels Sprouts

Cool Things that happened this week:

*Successfully ate Whole30-compliant foods all week

*Taught a fantastic group of teachers in a writing workshop

*Taught some Zumba

*Had a fun and hilarious dinner with a group of friends

*Went back to yoga after a bit of a (*ahem*) hiatus.


Today is actually the last Friday off of the summer. (During summer months, we work 10-hour days and have Fridays off.) I am spending the day catching up on my blogging, possibly going to yoga, getting a massage (holla!) and maybe a little light shopping/errand-running.


Note to the husband...if you are reading...I said *LIGHT*. Do not panic.


Now that we are all caught up, lets talk about veggies. And bacon.


Once upon a time, I thought I hated Brussels Sprouts. Funny thing is...I actually never remember trying them as a kid! So, thirty-ish years later, here I am, not only eating them, but writing about them and taking pictures of them.


One of my favorite ways t eat them is halved, tossed in olive oil, and roasted with some salt and pepper. However, last week I thought I would try a new approach.


They have bacon. Does that interest you? Who doesn't love bacon?


AND there are only a few ingredients!


Bacon Brussels Sprouts


Ingredients:

  • Olive Oil
  • Brussels Sprouts (I used about 10)
  • 3-4 strips of bacon (I used Earth Fare's Uncured Turkey Bacon)
  • Salt, pepper, garlic powder, to taste


Preparation:


Prepare your sprouts. Remove the outer wilted leaves and slice in half. Wash well to remove any grit and then let them dry. Then, shred them by slicing them. (Just place them cut-side down and slice lengthwise until they are thin strips.)


Heat 1 Tbsp. EVOO in a skillet over medium-high heat. Add the turkey bacon. (Note- my uncured turkey bacon produces very little bacon fat. If you use a fattier bacon, you may not need as much oil- or you may not need any.) Cook turkey bacon until browned and crisp and then set aside. Leave any bacon drippings in the pan.


Add the Brussels and start to sauté. While the sprouts are cooking, chop the bacon into smaller pieces. Then add the bacon back to the pan. Sprinkle salt, pepper, and garlic powder over the mix and cook until the sprouts are tender. Serve hot!


Happy weekending!


Saturday, July 13, 2013

Seafood by the Sea

Happy Saturday, friends! I can't believe it, but our week at the beach is already over. As I type, we are in the car, making our way back home. It's always sad to say goodbye to the beach and our family after our fun week is over. This week, we ate too much, played lots of games, soaked up lots of sun, swam in the pool, enjoyed nightly golf cart rides, and had a lot of laughs.


I thought I would write one final beach post about some of our beach eats.


First up: Creek Rolls


My sister Meredith and her husband David introduced us to Creek Rolls last year. Creek Rolls are a lot like spring rolls, but they are filled with all sorts of goodies, like local shrimp. You can buy Creek Rolls from The Crab Cake Lady or from Harrelson's Seafood Market in Murrell's Inlet. I couldn't find a website for Harrelson's, but here is a listing on Urban Spoon:


Harrelson's Seafood Market on Urbanspoon

If you happen to be in the Surfside Beach, Garden City, or Litchfield Beach areas, this would be a great place to get fresh seafood.


Warning about Creek Rolls: these do not last long! Once is platter was set out on the table, I had to snap pictures quickly before everything disappeared!


Next: Low Country Boil.


If you are from the South, then you have probably grown up eating this simple meal. It has lots of names: Shrimp Boil, Frogmore Stew, etc. This is my brother-in-law's signature beach meal. He and my sister make this for us every year at the beach. Low Country Boil includes: potatoes, sausage, shrimp, and corn on the cob. Sometimes, you can add in crab legs for an extra treat, also. Everything is cooked in a pot together with Old Bay seasoning.


David's Low Country Boil:

Ingredients:

(Note- the amounts ar appropriate- these can be adjusted for your tastes)

  • 6 Budweisers
  • 3/4 cup Old Bay Seasoning
  • Red Potatoes (1-2 per person)
  • Corn on the cob (frozen, 1-2 per person)
  • Sausage, sliced (ex: kielbasa, 1/2 lb. per person)
  • Shrimp (raw, unpeeled, 1/2 lb. per person)

Preparation:

(We cook outside, but this can be prepared on the stovetop in a large stock pot.)

  1. Boil water, Budweisers, and old Bay.
  2. Add potatoes and cook 10 minutes. (David just leaves then whole.)
  3. Add corn on the cob and cook 5 minutes.
  4. Add sliced sausages and cook five minutes.
  5. Add shrimp and cook until pink and floating to the top.
  6. Drain water and serve!

Cooking tip: playing a game of corn hole helps pass the time.


So does great scenery.


This year, we decided to make things REALLY simple. We lined our table outside by the pool with newspapers and just dumped everything on the table.

Cheers to seafood!


We gathered around with empty plates and dinner was served "family style!" After dinner, clean-up was super easy. Just grab the newspapers and boom: clean table.


Finally: Mom and Dad's Baked Shrimp.


This simple appetizer made by my parents was a huge hit! It is so simple, but so delicious! My mom found this recipe on Pinterest, but adapted it slightly.

Ingredients:

  • 1 stick of butter
  • 2 lemons, sliced
  • Shelled uncooked shrimp (approximately 2-3 lbs- as many as will fit on your baking sheet)
  • Creole Seasoning (as much or as little as you like)

Preparation:

  1. Preheat oven to 450 degrees.
  2. Line a baking sheet (with a rim) with foil or parchment paper. Melt stick of butter and pour over the baking sheet.
  3. Lay sliced lemons on the melted butter. Space evenly over pan.
  4. Lay shrimp over top of the butter and lemons.
  5. Sprinkle everything with creole seasoning.
  6. Bake for 15 minutes (or until shrimp is cooked through).
  7. Dump everything into a serving dish and serve immediately. No sauce needed!

Again- these do not last long! These would make a great appetizer for a summer party!


We sure had a lot of great eats this week. I am already missing the beach! Hopefully we will see the waves and put our toes in the sand again sometime soon. But for now...


Goodbye, Surfside!